
In Part I, we discussed causes of low back pain from a physiological and energetic standpoint, and how Chinese Medicine can use acupuncture, diet, lifestyle changes, and herbs to help reduce or eliminate pain. One of the main lifestyle changes I recommend for patients experiencing back pain is to practice yoga, starting with easier poses that can be modified for all levels and abilities.
Yoga has many levels of depth to its practice, but I always have people start simply and think of it as gentle stretching. You don’t have to be able to bend into a pretzel shape to practice yoga. Just start wherever you are. Yoga is not a competition as we yoga teachers like to say. The beautiful thing about yoga is that your practice meets you are, and that is a different place every day. Some days, your back may really be hurting you, and you may need to do less or not stretch as far in a pose. Respect your body and where it is each time you get on the mat, in a chair for chair yoga, or even in the bed if you start there with your practice. Keep in mind not to push past where you feel a gentle, “good stretch.” You should never feel pain in a yoga pose. If you feel pain, back out of the pose or wait in a seated pose or child’s pose until your instructor moves on to another pose if you are taking a class.
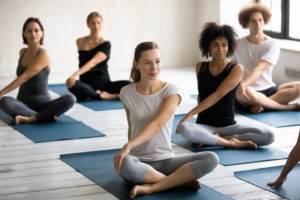
Regardless of what you may see in the media, yoga is not just for skinny white women in expensive Lululemon pants. Yoga is for everyone, regardless of your ability or current flexibility. Below are some easy yoga poses (asanas) for low back pain that anyone with mobility from the waist up can do, even in bed! They can be done as a short sequence, or you can pick one or two to do as you’re able.
Disclaimer: Please consult with your medical doctor prior to engaging in any physical exercise. If you are cleared for physical activity, and you feel pain, lightheaded, or dizzy at any time during your practice, stop and consult with your medical doctor before resuming physical activity. Do not perform these poses while pregnant, as many of them are not safe during pregnancy without modifications, and certain poses should be avoided completely during pregnancy.
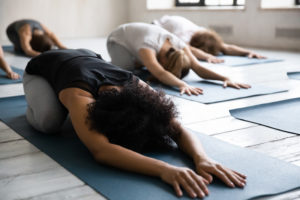
- Child’s pose– kneel on a yoga mat, placing a blanket under your knees if needed. Alternatively, you can also try this pose in your bed if you need even more support. Sit on your heels, and then gently fold your torso over your legs, reaching your hands out in front of you. If you can, rest your forehead on the mat. Do your best to keep your buttocks as close to your heels as you can. If it’s too painful or too challenging to have your stomach or chest resting on your thighs in this pose, you can spread the knees apart from one another, which allows space for the belly and chest, and can also deepen the stretch. Take a few breaths in this passive stretch, and then gently walk the hands back towards your shoulders and then press back up to a seated position and release.
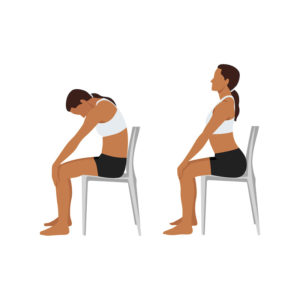
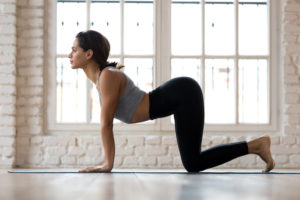
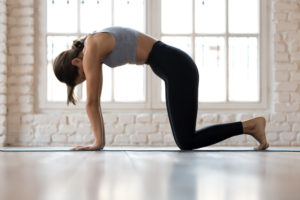
- Seated cat/cow– sitting in an easy cross-legged position on the floor or sitting in a chair with your feet flat on the floor, place your hands on your knees or thighs. On the inhale, arch your back, bringing your chest forward and gently lifting the chin. On the exhale, round the back, bringing your chin to your chest. Repeat a few times to help warm up the back. You can also do the “regular” version of cat/cow, on your hands and knees (see pictures above), if preferred.
- Gentle seated twist– sitting in an easy cross-legged position on the floor or sitting in a chair with your feet flat on the floor, gently twist your torso to the right, and place your left hand on your right knee, and the left hand on the floor behind you (if sitting on the ground) or on the back of the chair (if seated in the chair). On the inhale, straighten the spine slightly, and on the exhale, bend a little deeper, as far as you are comfortable. Hold 3-4 breaths and then switch sides, twisting to the left, and taking the right hand to the left knee, and the left hand behind you or to the chair back. Hold 3-4 breaths. As you feel more comfortable in this position, you can either repeat one more time per side, and/or hold for a longer number of breaths per side.
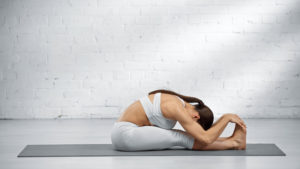
- Seated forward fold– sitting on the ground, extend both legs in front of you, keeping the legs together, and adjust any hip and thigh flesh so you are comfortably sitting up. If this is tight, stay here, but if you are able to go deeper, without bending your knees, reach the arms overhead and gently fold forward from the hips. Place your hands down on your legs wherever you can, and breathe. Hold a few breaths. If you are able, gently inch the fingers forward down the legs every couple breaths. When you are done, gently walk the hands back up your legs to come back to seated. Chair modification: If sitting on the floor is too painful or challenging right now, sit on the edge of a chair, and extend your legs outward so your legs are straight with the feet or heels touching the ground, typically a couple feet away from the chair. Reach your arms upward and on the exhale, bend at the waist and fold forward. Bring your hands down to your legs and take a few breaths, inching your fingers forward as you are able. When you’re ready, walk your hands back up until you are sitting upright, and then bring your feet back so you are in a normal seated position at the edge of the chair.
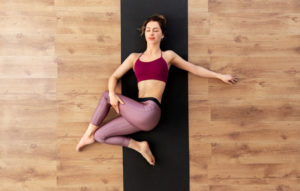
- Reclined twist, both knees to one side– lying on your back on a yoga mat or on your bed (if you are on your bed, remove your pillow so your head is flat on the mattress), bend your knees and place your feet flat on the floor/bed. Gently lift your hips by pressing into the floor/bed with your feet, and place the hips back on the mat/bed to the right, just a little off-center. Take both of your knees to the left as far as you can. If they don’t touch the mat/bed, that’s ok. Just hold and breathe 3-4 breaths. Return the knees to the center. Push and lift your hips up again, now taking them to the left, just off-center. Place the hips down and then take both of your knees to the right as far as you can. Take 3-4 breaths here. Bring the knees back to center, re-center your hips, and release the legs back down. As you get more comfortable with this pose, you can repeat it one more time per side, and/or hold each side longer.
- “Cheap and easy back massage” as I like to call it- lie on your back, bring your knees into your chest and grab onto your shins or the backs of your thighs if you are able, and rock side to side gently. Then you can begin to roll your knees in a circle to one side 3-4 times, and reverse it to the other direction. Rock gently side to side a few more times and release. You can do this one in a bed, but you will feel a little more relief if you are rocking on a slightly harder surface, such as on the carpet or on a rug over hardwood floors. If you are using a yoga mat on hardwood floors, you may need to place a blanket under your lower back and hips for this exercise, since some people may find it too painful otherwise.
These are just a few of the poses that will give you a little relief. To find lasting relief, the core muscles must be strengthened, which requires different types of poses. Fortunately, yoga is great for building core muscle strength. In Part III, we will discuss more challenging yoga poses that can help you develop a strong core to prevent low back pain from recurring.
Recent Comments